การอัพโหลดไฟล์ bin (binary) ที่คอมไพล์แล้วเข้าบอร์ด esp8266 มีหลายวิธีมาก ในบทความนี้ผมจะแนะนำโปรแกรม nodemcu-flasher ดาวน์โหลดได้จาก https://github.com/nodemcu/nodemcu-flasher ซึ่งคิดว่าง่ายที่สุดสำหรับ user ทั่วไปที่ไม่อยากติดตั้ง arduino ide และ library มากมายให้ยุ่งยาก
ปล. ถ้าซื้อบอร์ดจากร้านอื่น จะใช้กับ iotkiddie ไม่ได้นะครับ จะรองรับเฉพาะบอร์ดที่ซื้อจากร้านผมเท่านั้น(อุดหนุนกันหน่อยนะครับ🥺😙)
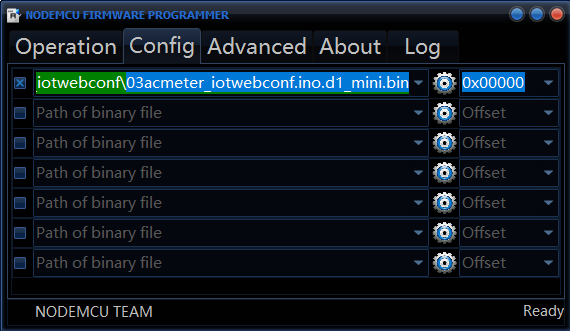
เปิดโปรแกรมจาก nodemcu-flasher/Win64/Release สำหรับเครื่อง 64bit และ nodemcu-flasher/Win32/Release สำหรับ 32bit เปิดโปรแกรมได้เลยโดยไม่ต้องติดตั้ง
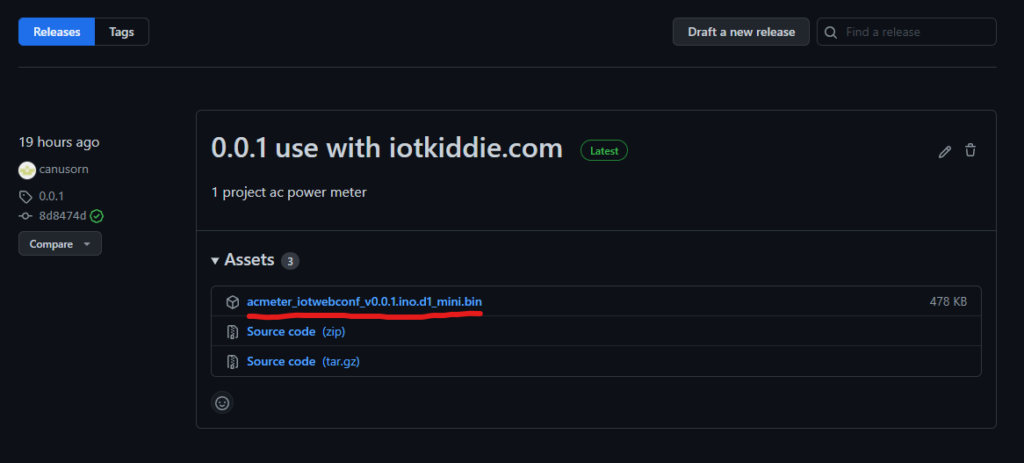
โหลดไฟล์ binary จาก https://github.com/canusorn/Iotbundle-esp8266/releases แนะนำเลือกไฟล์เวอร์ชั่นล่าสุดครับ โดยไฟล์แต่ละโปรเจคจะมีชื่อโปรเจคและเวอร์ชั่นกำกับไว้ เช่น โปรเจค acmeter จะมีชื่อ acmeter_iotwebconf_vx.x.x.ino.d1_mini.bin
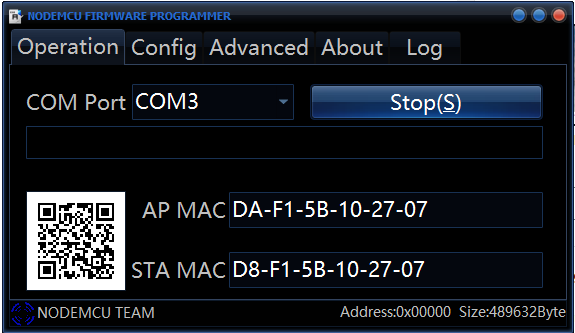
เสียบ micro usb กับบอร์ด esp8266 และเปิดโปรแกรม จะมี COM Port
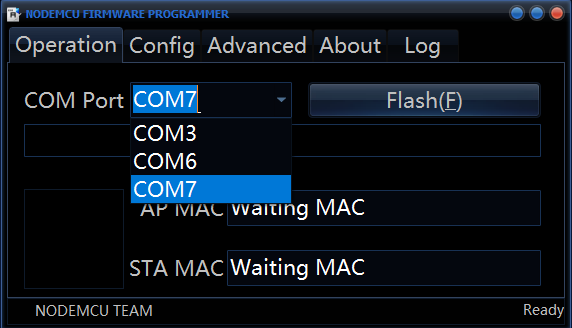
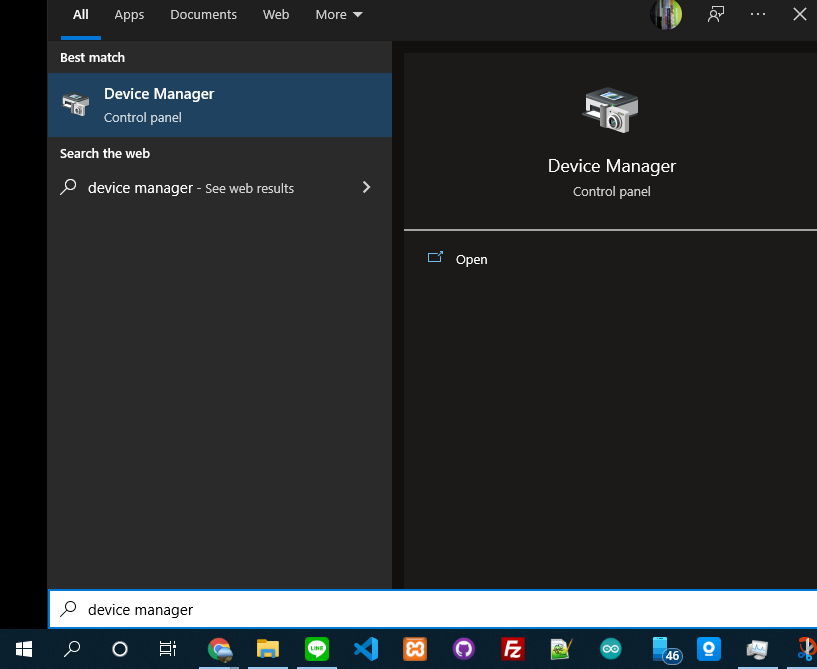
จะมี com port ขึ้นมา ถ้ามีหลายตัวแล้วไม่รู้ว่าคืออันไหน เช็คได้จาก start -> search -> Device manager (อาจจะแตกต่างกัน แล้วแต่เครื่อง และเวอร์ชั่นของระบบปฏิบัติการ)
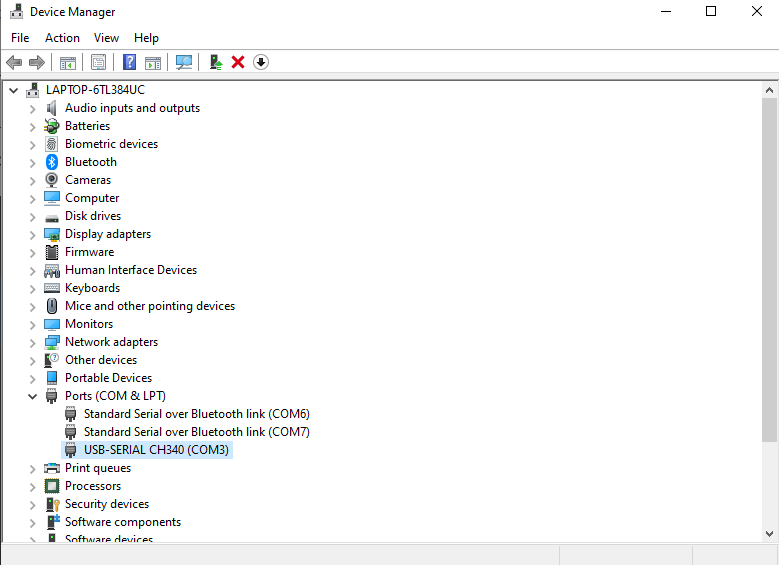
ของเครื่องผมจะเป็น COM3 แต่ละเครื่องจะไม่เหมือนกัน
แต่ถ้าไม่เจอพอร์ตตามรูป ไม่ต้องตกใจ ให้ลงไดร์เวอร์ docs.wemos.cc/en/latest/ch340_driver.html
เมื่อเจอพอร์ตเรียบร้อยแล้ว ก็เลือกพอร์ตใ้ห้ถูกต้อง (แต่ถ้าเลือกผิดไม่เป็นไรครับ มันจะ Flash ไม่ผ่านแค่นั้นเอง)

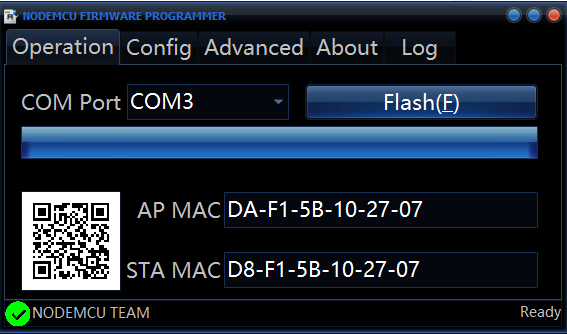
เสร็จสิ้นแล้วสามารถนำไปใช้งานได้เลย ตาม https://iotkiddie.com/blog/docs/setting-wifi-user-on-device/


