สารบัญ สามารถคลิกเพื่อเลื่อนไปดูหัวข้อที่ต้องการได้เลย
ด้าน google sheet
สร้างไฟล์ google sheet ที่ต้องการ

ที่ลิ้งค์ด้านบน จะมี Sheet id ตามตัวอย่างด้านล่าง ให้ก็อปปี้เอาไว้

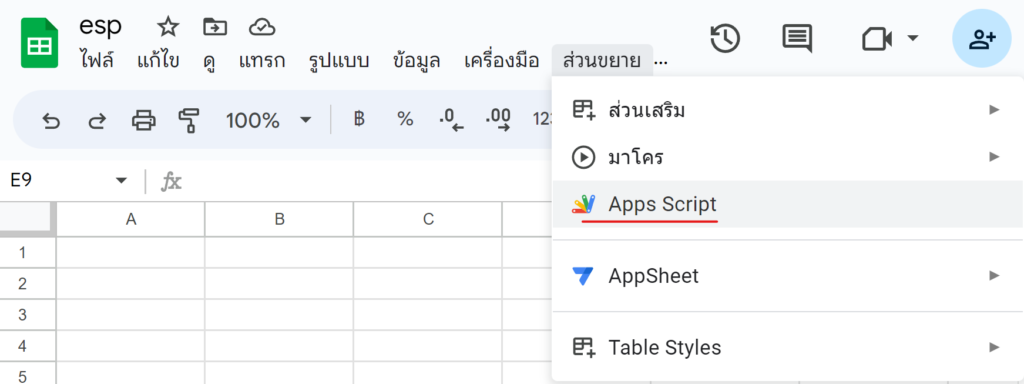
เลือกที่ ส่วนขยาย>Apps Scritp
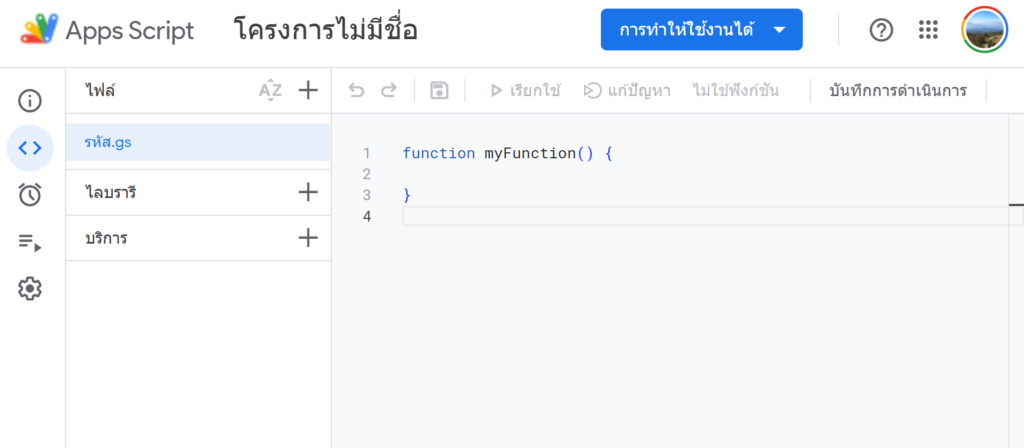
จะเจอหน้าสำหรับใส่ Script ให้ส่งสคริปด้านล่างนี้
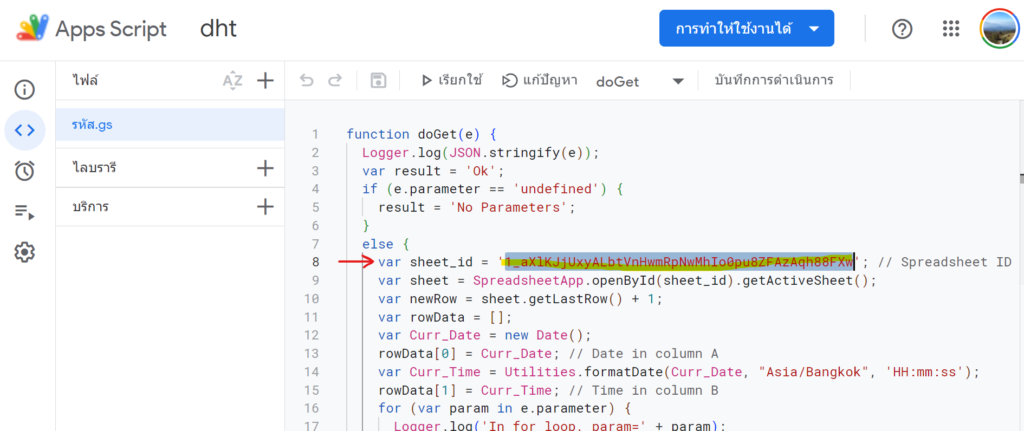
ดัานล่างนี้จะเป็นสคริปสำหรับรับค่า temp และ humid
function doGet(e) {
  Logger.log(JSON.stringify(e));
  var result = 'Ok';
  if (e.parameter == 'undefined') {
    result = 'No Parameters';
  }
  else {
    var sheet_id = 'xxxxxxxxxxxxxxxxxxxxxxxxxxxxxx'; // Spreadsheet ID
    var sheet = SpreadsheetApp.openById(sheet_id).getActiveSheet();
    var newRow = sheet.getLastRow() + 1;
    var rowData = [];
    var Curr_Date = new Date();
    rowData[0] = Curr_Date; // Date in column A
    var Curr_Time = Utilities.formatDate(Curr_Date, "Asia/Bangkok", 'HH:mm:ss');
    rowData[1] = Curr_Time; // Time in column B
    for (var param in e.parameter) {
      Logger.log('In for loop, param=' + param);
      var value = stripQuotes(e.parameter[param]);
      Logger.log(param + ':' + e.parameter[param]);
      switch (param) {
        case 'temperature':
          rowData[2] = value; // Temperature in column C
          result = 'Temperature Written on column C';
          break;
        case 'humidity':
          rowData[3] = value; // Humidity in column D
          result += ' ,Humidity Written on column D';
          break;
        default:
          result = "unsupported parameter";
      }
    }
    Logger.log(JSON.stringify(rowData));
    var newRange = sheet.getRange(newRow, 1, 1, rowData.length);
    newRange.setValues([rowData]);
  }
  return ContentService.createTextOutput(result);
}
function stripQuotes(value) {
  return value.replace(/^["']|['"]$/g, "");
}
ในส่วนของ sheet id ให้เอา id จากลิ้งค์ของไฟล์ google sheet ที่เคยก็อปปี้ไว้แล้ว มาใส่ตามตัวอย่างด้านล่าง
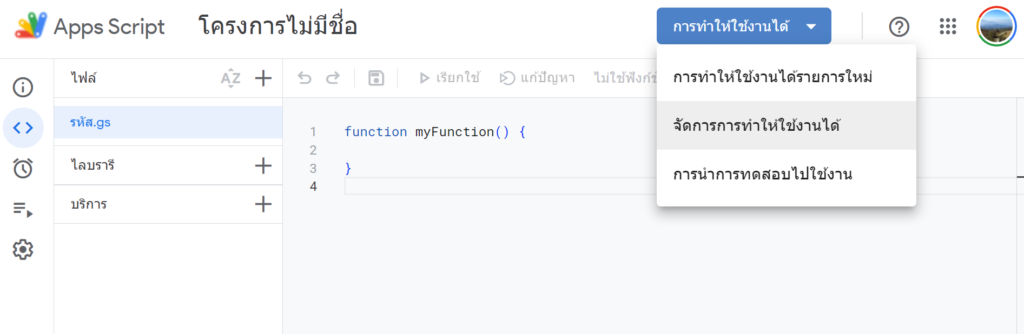
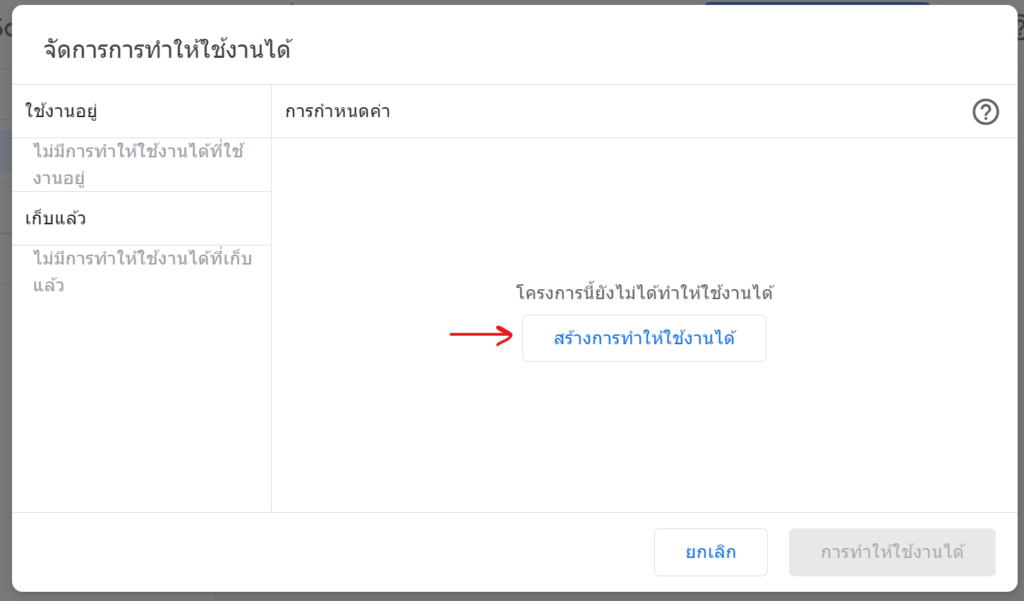
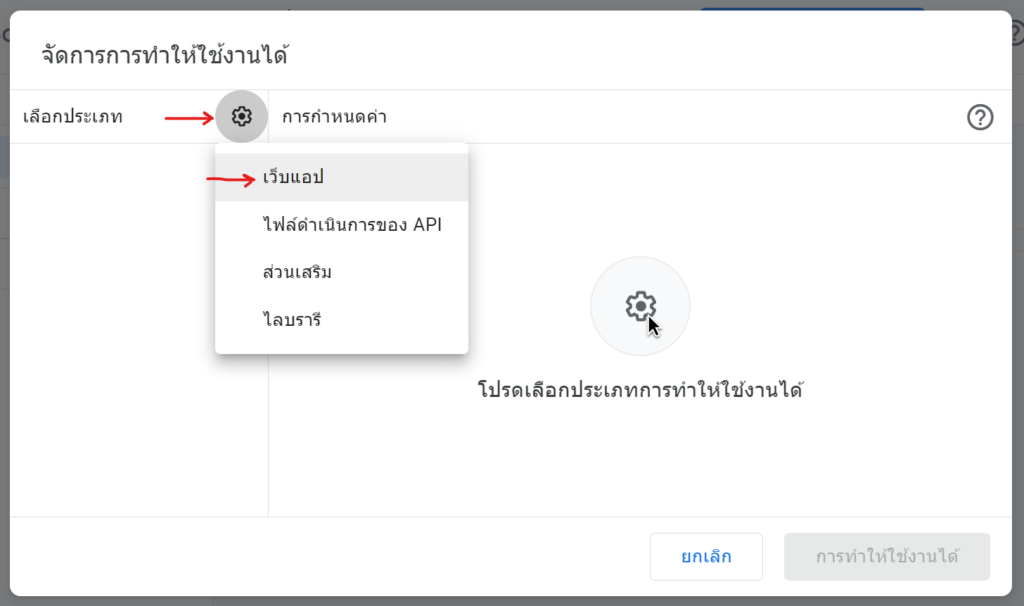
เลือกสร้างเป็นเว็บแอป
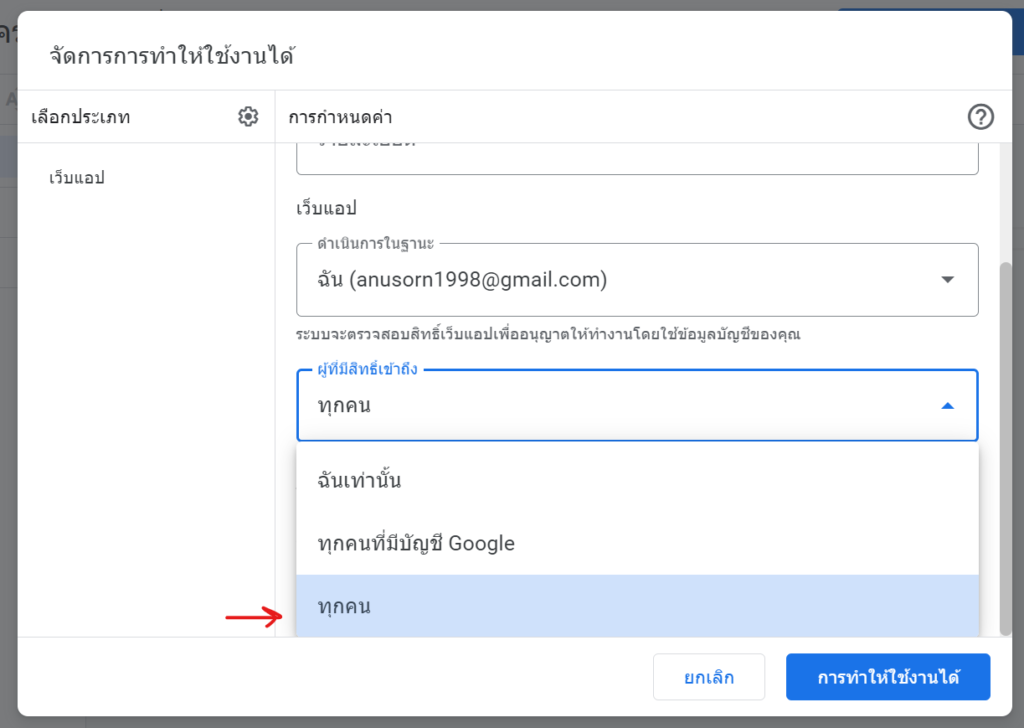
เลือกสิทธิการเข้าถึงเป็นทุกคน
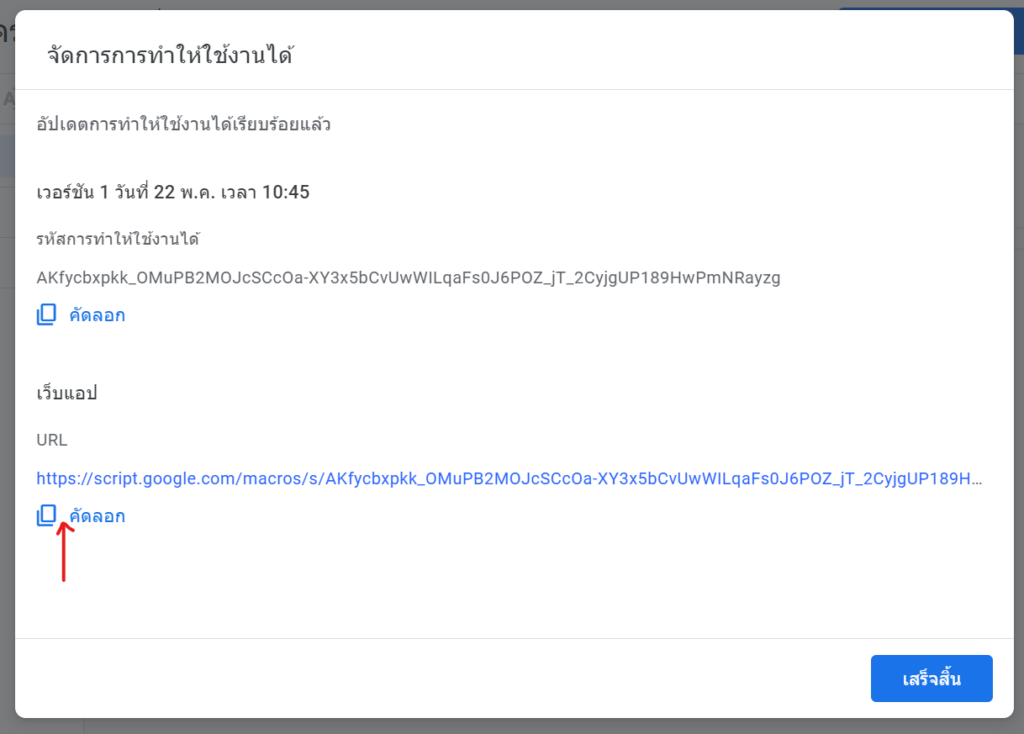
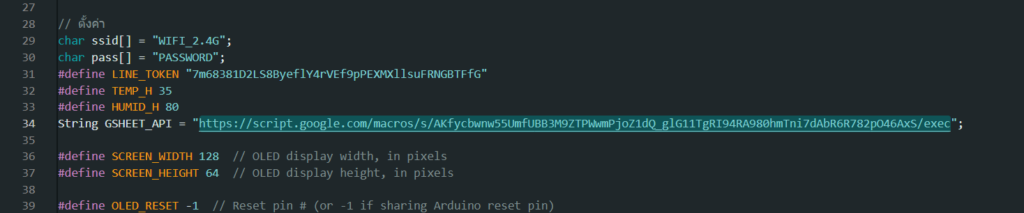
จะได้ URL ของ google sheet api ให้นำไปใส่ในโค้ด ESP8266
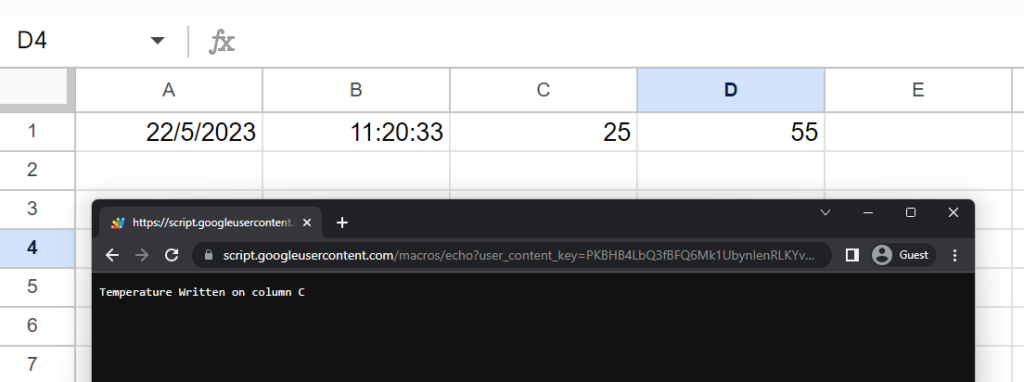
ทดสอบโดยการนำลิ้งค์ที่ได้มาต่อด้วยข้อความด้านล่าง (เป็น api สำหรับ http get)
?temperature=25&humidity=55
จะเห็นว่า api นี้สามารถใช้งานได้กับ google sheet โดยใช้ http get
ด้าน ESP8266
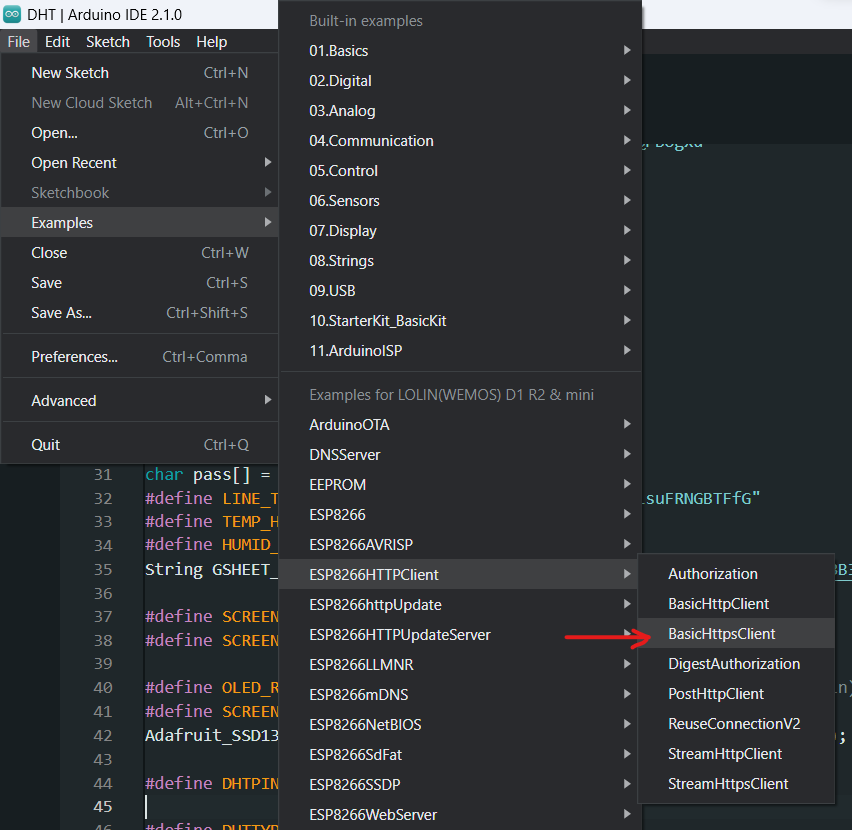
จะใช้ตัวอย่างของ http get ตามรูป
และเพิ่มเติมสำหรับอ่านค่าจาก dht โดยส่งค่าขึ้น google sheet ทุก 10 วินาที
จะได้โค้ดตามด้านล่างนี้
No responses yet