สารบัญ สามารถคลิกเพื่อเลื่อนไปดูหัวข้อที่ต้องการได้เลย
Hello webserver
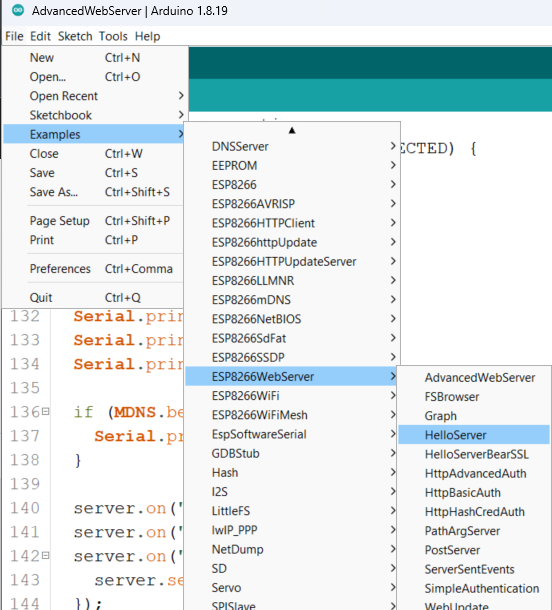
เริ่มจากทดลองตัวอย่างแรกจากตัวอย่าง HelloServer เป็นตัวอย่างการทำ ESP8266 เป็นเว็บเซอร์เวอร์เพื่อให้เราสามารถเข้าไปดูผ่านหน้าเว็บได้
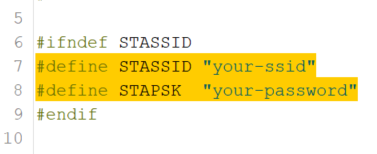
อย่างลืมแก้ชื่อไวไฟกับพาสเวิร์ดด้วยครับ
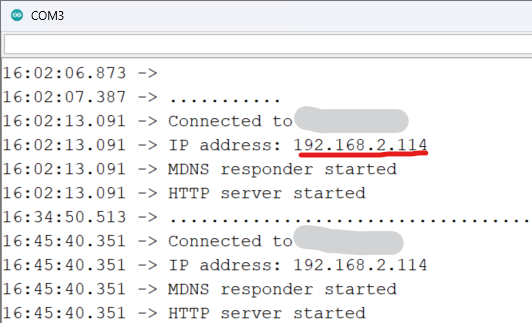
เปิดหน้า Serial monitor จะมีหน้า Ip address ให้นำไปเปิดในเว็บบราวเซอร์
จะเจอหน้าตามรูป
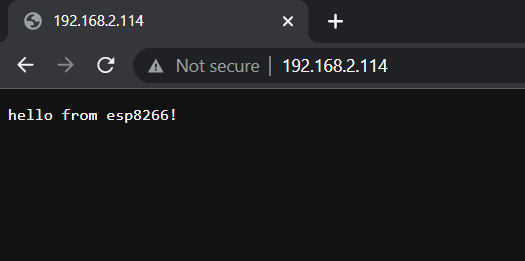
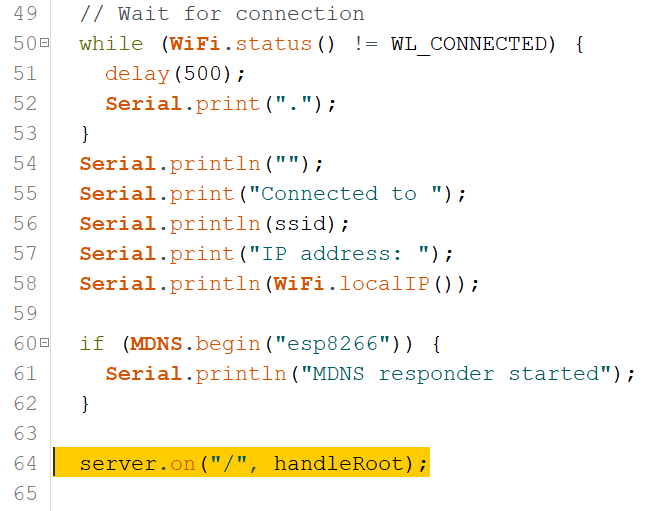
อ้างอิงจากคำสั่งในฟังก์ชั่น setup() เมื่อมีการเรียกหน้า “/” (เรียกว่า root หรือหน้าแรกสุดของเว็บ) ให้เรียกฟังก์ชั่น handleRoot
ที่ฟังก์ชั่น handleRoot จะมีคำสั่งตอบกลับเป็นข้อความ “hello from esp8266”

และเมื่อลองเปิดหน้าอื่นๆ


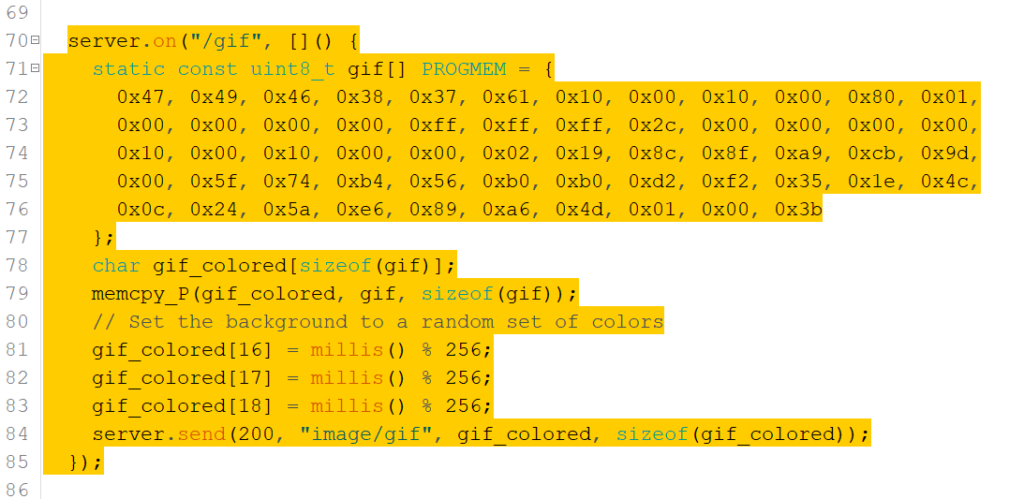
หรือเป็นรูปภาพ bitmap

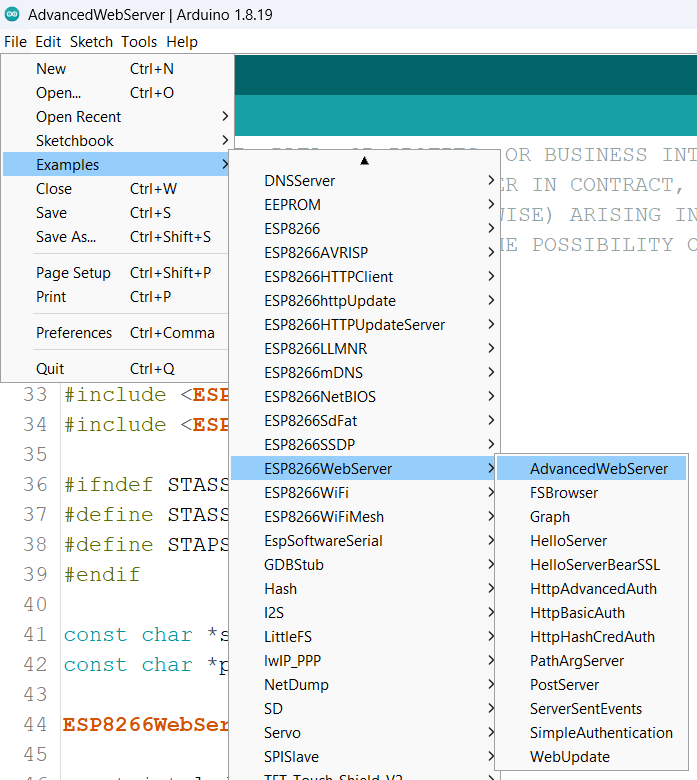
AdvancedWebServer
ต่อไปทดลองใช้ตัวอย่าง AdvancedWebserver ดูบ้าง
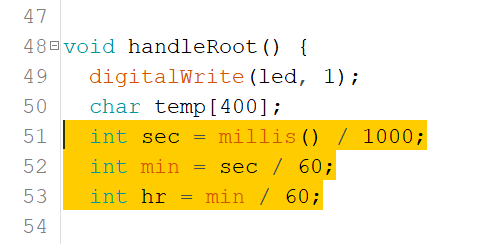
จะเห็นว่าในฟังก์ชั่น handleRoot จะมีส่วนที่คำนวณค่าเวลา uptime
ในส่วน html จะมีเพิ่ม meta tag เพื่อให้หน้าเว็บโหลดใหม่ทุก 5 วินาที และโชว์เวลา uptime ที่คำนวณมากจากด้านบนด้วย
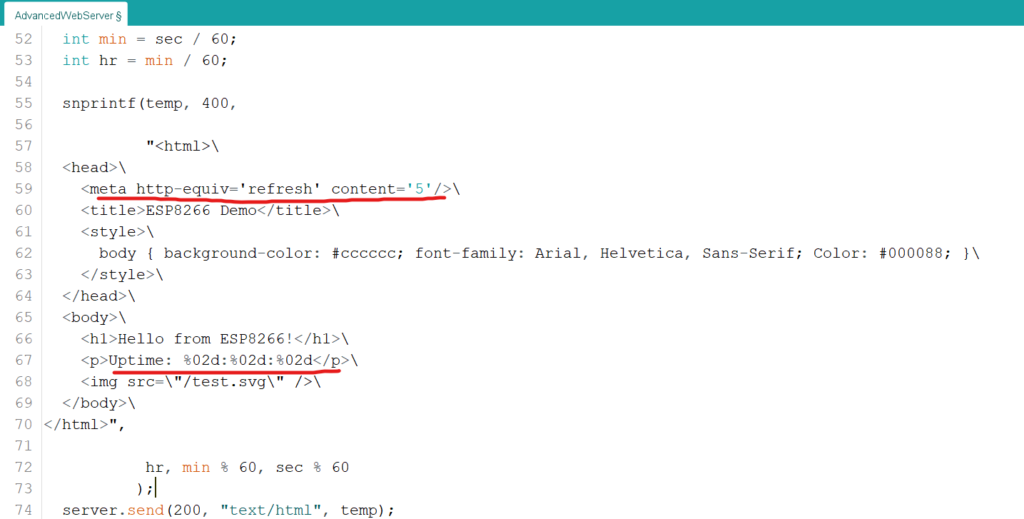
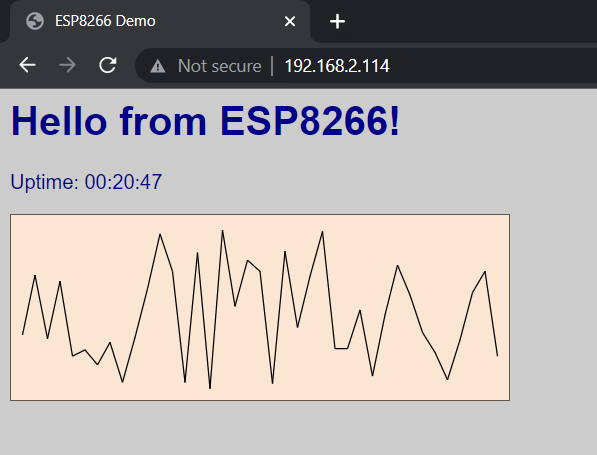
เมื่อเปิดดูหน้าเว็บจะเห็นว่ามีการแสดงค่า uptime ที่ได้คำนวณจากโค้ด จะเห็นว่าค่าจะไม่เปลี่ยนแปลงเป็นระยะเวลา5วินาที เมื่อครบ 5 วินาทีแล้วจะมีการรีเฟรชหน้าอัตโนมัติจาก meta tag ใน html นั่นเอง
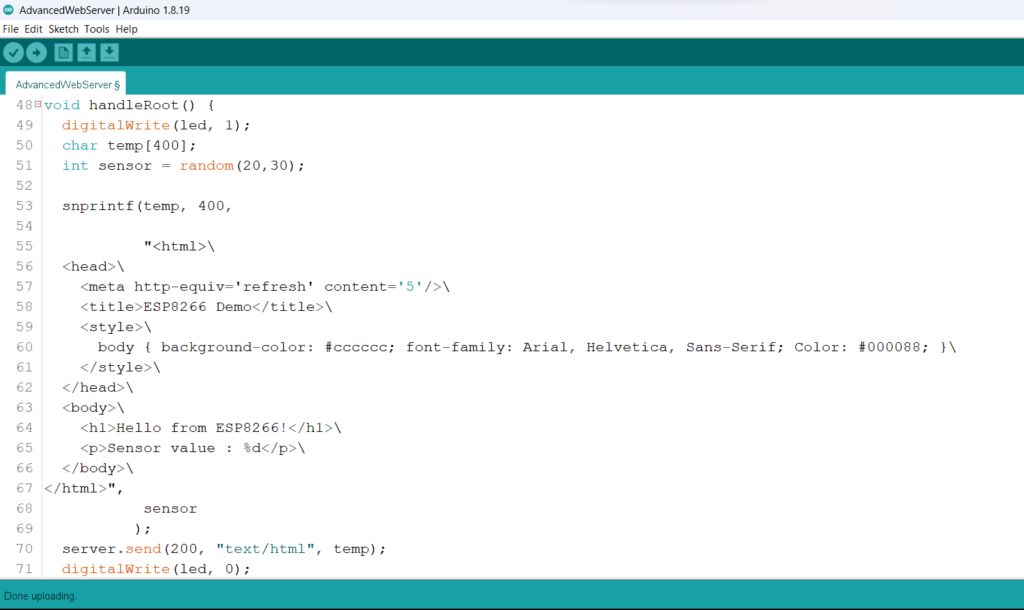
เราสามารถนำมาประยุกต์ใช้แสดงค่าจากเซนเซอร์ได้ ในที่นี้ผมสุ่มค่า 20-30 ขึ้นมา และให้แสดงผ่านหน้าเว็บแทนตำแหน่งที่แสดงค่า uptime ของตัวอย่างเดิม และลบส่วนรูปด้านล่างออก
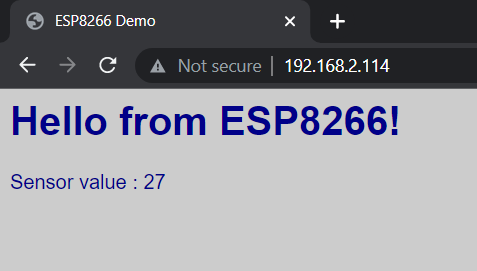
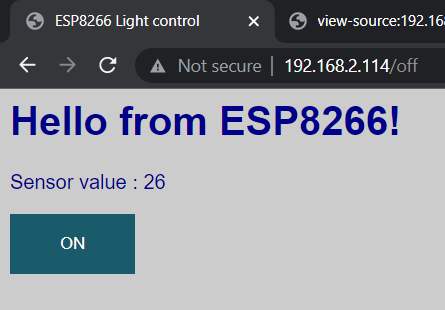
จะเห็นว่าค่าที่สุ่มขึ้นมาจะแสดงบนหน้าเว็บและอัพเดทค่าให้ทุก5วินาทีแล้ว
เพิ่มการควบคุมเปิดปิด LED ผ่านหน้าเว็บ
ทดลองเพิ่ม button สำหรับควบคุม LED
โดยแก้ไขโค้ดเป็นดังนี้
#include <ESP8266WiFi.h>
#include <WiFiClient.h>
#include <ESP8266WebServer.h>
#include <ESP8266mDNS.h>

#ifndef STASSID
#define STASSID "SSID"
#define STAPSK  "PASS"
#endif

const char *ssid = STASSID;
const char *password = STAPSK;

ESP8266WebServer server(80);

void handleRoot() {

  html(0);

}

void handleNotFound() {
  String message = "File Not Found\n\n";
  message += "URI: ";
  message += server.uri();
  message += "\nMethod: ";
  message += (server.method() == HTTP_GET) ? "GET" : "POST";
  message += "\nArguments: ";
  message += server.args();
  message += "\n";

  for (uint8_t i = 0; i < server.args(); i++) {
    message += " " + server.argName(i) + ": " + server.arg(i) + "\n";
  }

  server.send(404, "text/plain", message);
}

void setup(void) {
  pinMode(D4, OUTPUT);
  digitalWrite(D4, HIGH);
  Serial.begin(115200);
  WiFi.mode(WIFI_STA);
  WiFi.begin(ssid, password);
  Serial.println("");

  // Wait for connection
  while (WiFi.status() != WL_CONNECTED) {
    delay(500);
    Serial.print(".");
  }

  Serial.println("");
  Serial.print("Connected to ");
  Serial.println(ssid);
  Serial.print("IP address: ");
  Serial.println(WiFi.localIP());

  if (MDNS.begin("esp8266")) {
    Serial.println("MDNS responder started");
  }

  server.on("/", handleRoot);
  server.on("/on", []() {
    digitalWrite(D4, 1);
    html(1);
  });
  server.on("/off", []() {
    digitalWrite(D4, 0);
    html(0);
  });
  server.onNotFound(handleNotFound);
  server.begin();
  Serial.println("HTTP server started");
}

void loop(void) {
  server.handleClient();
  MDNS.update();
}

void html(int state) {
  String temp;
  int sensor = random(20, 30);
  String buttonState;

  if (state) {
    buttonState = "<p><a href=\"/off\"><button class=\"button\">OFF</button></a></p>";
  } else {
    buttonState = "<p><a href=\"/on\"><button class=\"button\">ON</button></a></p>";
  }

temp = "<html>\
  <head>\
    <meta http-equiv='refresh' content='5'/>\
    <title>ESP8266 Light control</title>\
    <style>\
      body { background-color: #cccccc; font-family: Arial, Helvetica, Sans-Serif; Color: #000088; }\
      .button { background-color: #195B6A; border: none; color: white; padding: 16px 40px;}\
    </style>\
  </head>\
  <body>\
    <h1>Hello from ESP8266!</h1>\
    <p>Sensor value : " + String(sensor) + "</p>"
    + buttonState +"</body>\
</html>";

  server.send(200, "text/html", temp);
}
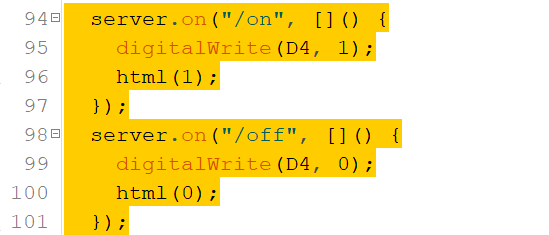
เมื่อมีการกดปุ่ม จะมีการ request ไปที่ “/on” หรือ “/off” ให้เพิ่มคำสั่งในฟังก์ชั่น setup โดยเมื่อมีการ request ตามลิ้งเข้ามาให้ทำการเปิดปิดหลอดไฟ และเรียกฟังก์ชั่น html() ซึ่งแยกออกมาจาก handleRoot เดิม เพื่อง่ายต่อการเรียกใช้งานผ่านค่า state ของหลอดไฟปัจจุบันด้วย
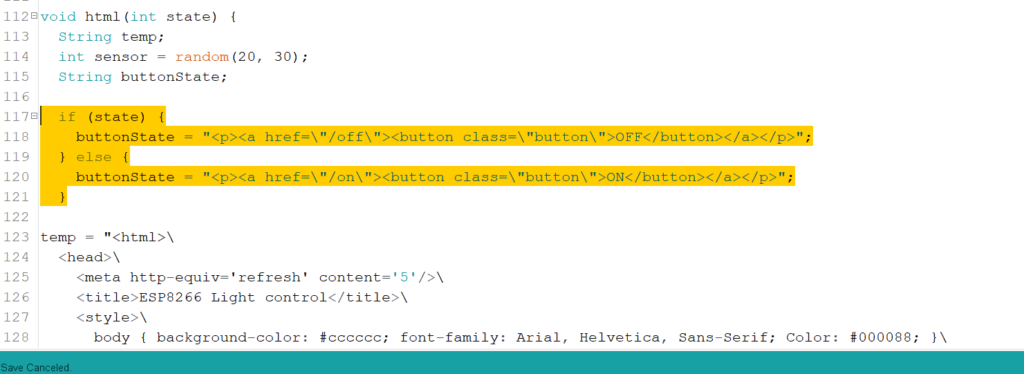
โดยในฟังก์ชั่น html จะรับค่า state ซึ่งจะเป็นตัวกำหนดการแสดงปุ่ม ON หรือ OFF ตามการ request เข้ามา และนำไปรวมใน html ที่จะ response กลับไปที่หน้าบราว์เซอร์
No responses yet